Tuesday, October 19, 2010

K'NEX set mini bots


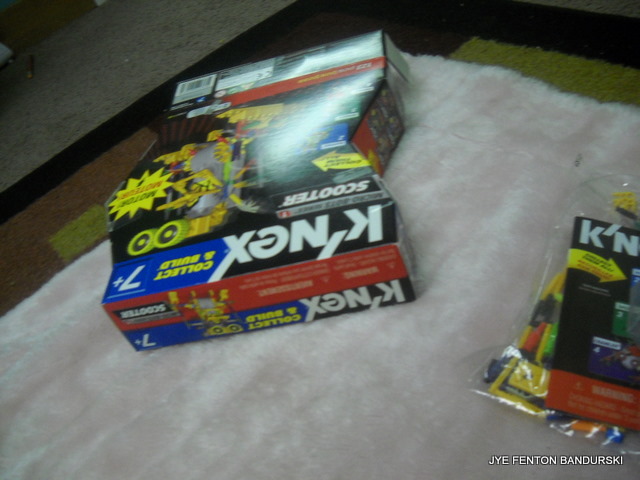
I got two k'nex sets from A.C.Moore in Ithaca where they had a buy one get one free so i bout one and received one free. So I opened them and there was an electric powered motor as part of the kit that would move the k'nex models it was so cool.

It was powered by 2 AA battery's it was so fun putting them together. It was so 1nteresting how it moves and walks! The first stage is to look at the instructions and look at the pieces and have a play with them to figure out what they do and how they do it and then read the manual and look at the plans to help you put it together.

I found out that it is very interesting how the pieces combine to make robots and creatures it is very cool i loved putting the pieces together it was fun. you have to be careful and don't rush ahead because u have to take some parts of if u make it wrong u will have to rebuild it until u are done with it.


Wednesday, October 13, 2010

The 1890 House


The 1890 House in Cortland N.Y is a impressive limestone mansion built in 1890. The Wickwires financial success came from their ability to produce reasonably priced window screening, wire fencing, and a variate of household wire items.


Gilded age fashion. Two decorating firms j.b Tiffany of new york city and Henry C. Allewelt & Sons of Syracuse.The spacious rooms not only provide ideal for entertainment but they also provided quiet refuge from hectic pace of the factory.

The entrance hall bold stenciling and carved oak woodwork greeted visitors entering the Wickwires residence. Combining of styles of architecture.

The east parlor had sliding doors of cherry and oak to keep rooms more warm in winter they close them to seal of rooms to keep them warmer. Alot of the rooms had a wood fire or coal fire and heavy curtains to keep out the cold in winter. the window also had a awesome wooden shade mechanism that had multiple wooden shades that would control how much light and cold would come inside.

The 1890 house needs money for repairs so if you do go there donate some money to keep the house in good shape i would hate to see it fall down! So please donate some money for repairs to keep the building standing.

The family made their master bedroom and morning room very personal with lots of family portraits modest furnishings and bric-a-brac arrangement.

The billiard room and the ballroom used exuberant colors and ceiling of the third recreational rooms the ballroom was made when they took down a wall of the third floor to make it bigger it became the ballroom.

Out of the House that i like was every thing it is amazing and i would recommend going there with kids and adults it is a fun yet learning environment it is very educational and very fun at the same time!!! ITS GREAT!!!

Wednesday, October 6, 2010

Building a chicken coop


The Design

First for your design you need to talk and mentality think of what you want it to look like. Then design your building on paper by going to your space and measuring how big or small you want it to be..... depending how many chickens or ducks you have to house and measure the space that they will need. the sketching process allows you to communicate or discus your ideas with family or builders.


step two evaluate the space

Second evaluate the space or location and change the design to fit or be stable and sturdy. We put a window in for natural light for summer and winter. You might even have to change the location if it is not enough space. Maybe change some of your materials. We where going to put up a hay wall but we didn't because we would have to change the hay every year, so we put a study permanent wall up made of wood and insulation instead.


step three collect your materials

third collect you materials such as what we used. We got 25 hay bails, some ply wood, non used wooden poles cut to the size we need, 3 bags of r15 insulation, screws of 3 in. and 2 1/2 sized screws and some 3 inch nails, a cord or cordless drill, a circular saw, and a chalk tape line, and a measuring tape and pen.

step.4 construction

Start to construct your coop by adding insulation with a staple gun if needed. Start cutting the insulation until it fits in the holes or the places between wood beams.
We had to do a lot of measuring and cutting in which case took a while.


Step.5 plywood paneling


start with the ply wood by putting it over the insulation so the chickens don't eat it Warning. insulation will damage a chicken in some way. Do not let them eat it that's why you put up the plywood in front of the insulation so they don't eat it, and to prevent damage to the insulation and chickens. work out the area for putting up the 4ftx8ft sheets of plywood making sure you have spots to screw the paneling to.

Step.6 natural lighting

If there is a spot that you can put a window in, it is a good idea to put one in. we used a recycled window from the house that was a pretty good fit. Use space filler around the edges of the window to keep it insulated and protect from cold ice winds in winter. natural light is more sustainable if the lights go off we can still see.

step.7 arange hay bails

We arranged straw bails on both sides for insulation and structural practicalities. by putting the bails of straw there you now have an insulated wall that the chickens an make nests on or sleep on.

step.8 patching

start patching up the floor by putting ply wood or any stable strong wood to cover it up, a chicken might fall trew it or get stuck that's why you patch up the floor. Now start construction ond the end wall that will be the door and insulated wall.

step.9 door and closing mechanism

first build a door that fits the door way you have made or use a dor that you are not using and use that if it fits. After you have made the door put 2 or 3 hinges in it so it wont fall down. Use a bolt lock to put on the door to close it put it on the outside of the door. On the inside put a hard to brake chain so you can close it so the chickens don't get out.

step.10&11 lights and roosts

if you don't have a light up there already you will need to put one in....... First strip enough of the plastic and wire it into the light. After wireing thi light put it in the roof with 3 to 5 screws maximum. next step 11 make some roosts for the chickens to sleep on at night to be off the cold floor make them reach from one side to the other and put at least 2 or 3 roosts in because some chickens might not be like in the flock so they now have a place to sleep with its pals that don't bite or peck it. Now that ur done with the roosts if you want to store ducks in it make a fence with a gate so you can get in and to keep the ducks from getting out also ducks don't like being with most chickens.